
I've had a hacked Nintendo DS for a while, and I always wanted to write something for it. I tried once before and gave up. This time I had a better excuse.
See, I'm also developing BotWave as one of my many projects, and if you don't know what it is, it's basically a software for Raspberry Pis that lets them broadcast FM radio.
Now you're probably telling yourself: but a DS isn't a Raspberry Pi?
And you're right. But see, BotWave has a remote command feature, that basically exposes a WebSocket acting as a cli interface, making a bridge between the internal commands and external scripts.
This blog post will document how I managed to build a setup making the DS and the Raspberry Pi able to communicate anywhere, anytime, and broadcast some cool songs.
devkitPro
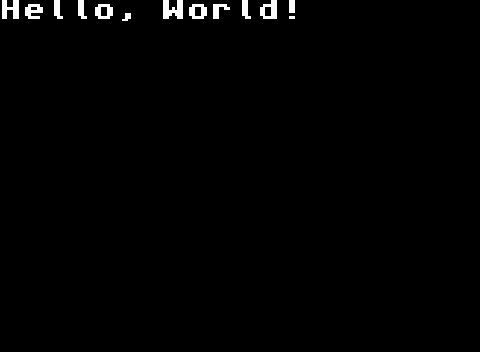
My first goal was to get an "Hello, world!" displayed on my DS screen. To do this, the easiest way seemed to install devkitPro on my system.
As said on their GitHub homepage: devkitPro is an organization dedicated to providing useful tools and libraries targeting a variety of (primarily Nintendo) game consoles.
They provide the required libraries and tools to build .nds files. Those files are ROMs that can be loaded by either an emulator or original hardware running custom firmware, such as the Wood R4 I use.
As for the hello world, it was fairly easy since the examples provide one:
#include <nds.h>
#include <stdio.h>

int main(void) {
    consoleDemoInit();

    iprintf("Hello, World!\n");

    while (1) {
        swiWaitForVBlank();
    }

    return 0;
}
To test it, I used the melonDS emulator:
Accessing A Network
The only way for a DS to access a network is using Wifi, but you can probably guess that it isn't this easy using a 2004 console.
First of all, the wifi settings on a Nintendo DS are managed in some obscure on-card way, and accessing them is terrible. Here is how I managed to do it:
-
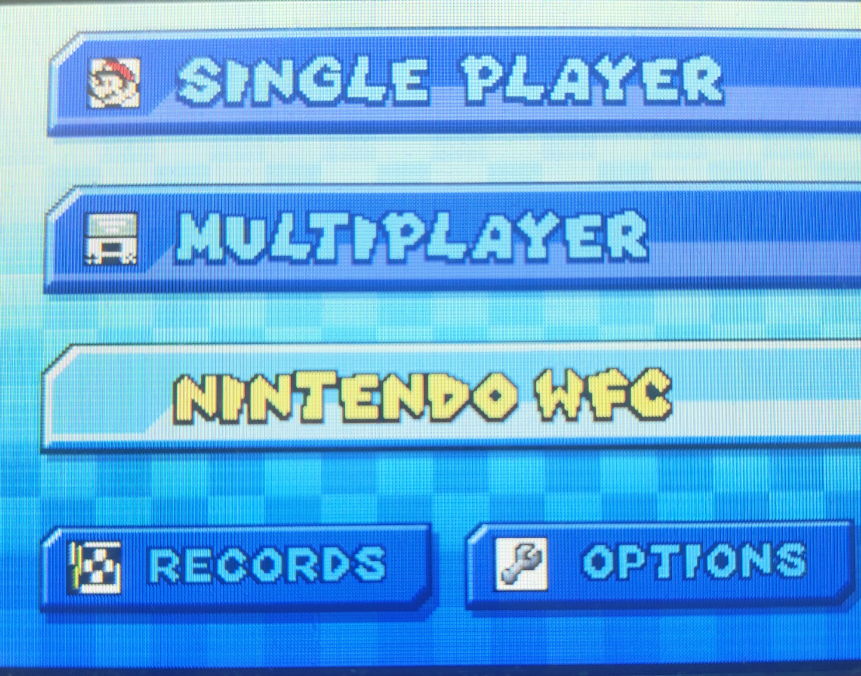
I loaded Mariokart DS
-
I went on the Nintendo WFC (Wi-Fi Connection)
-
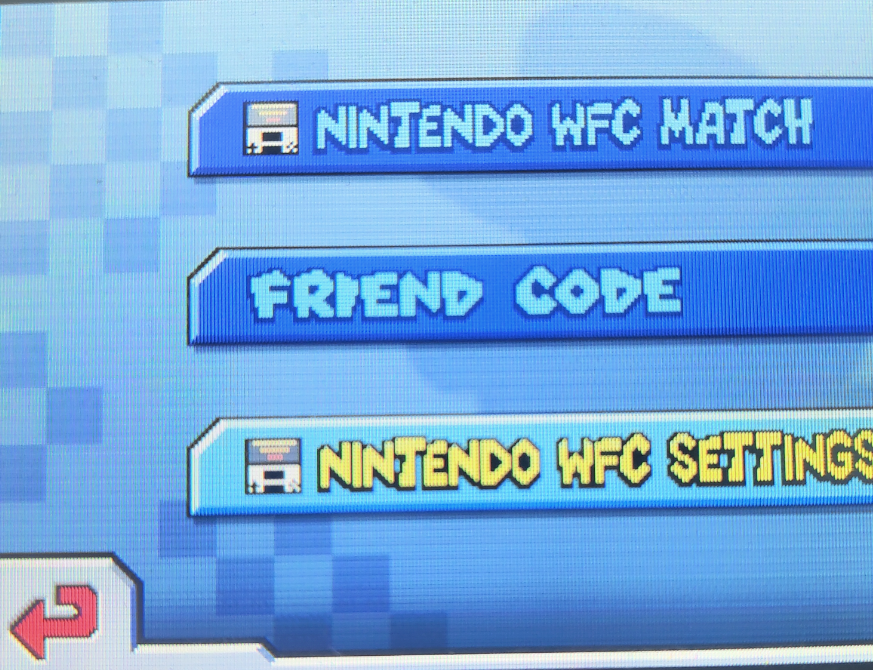
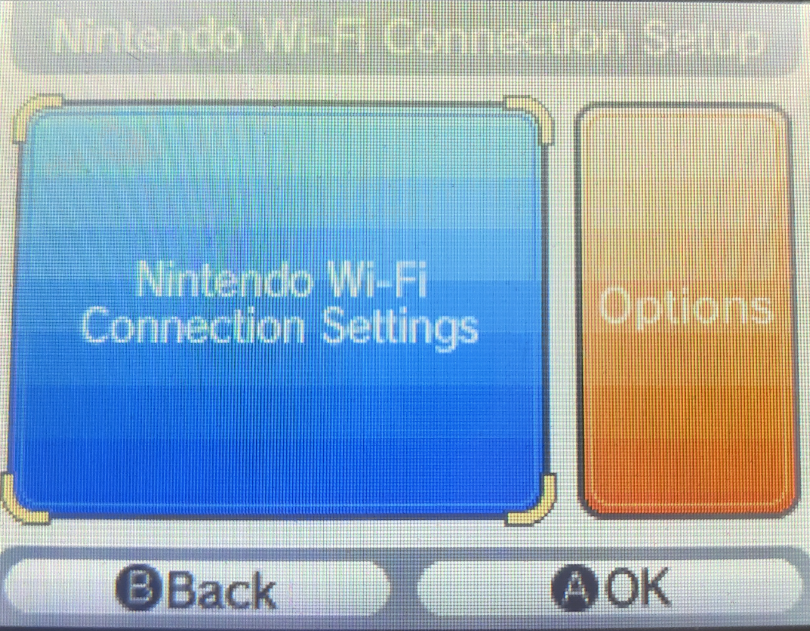
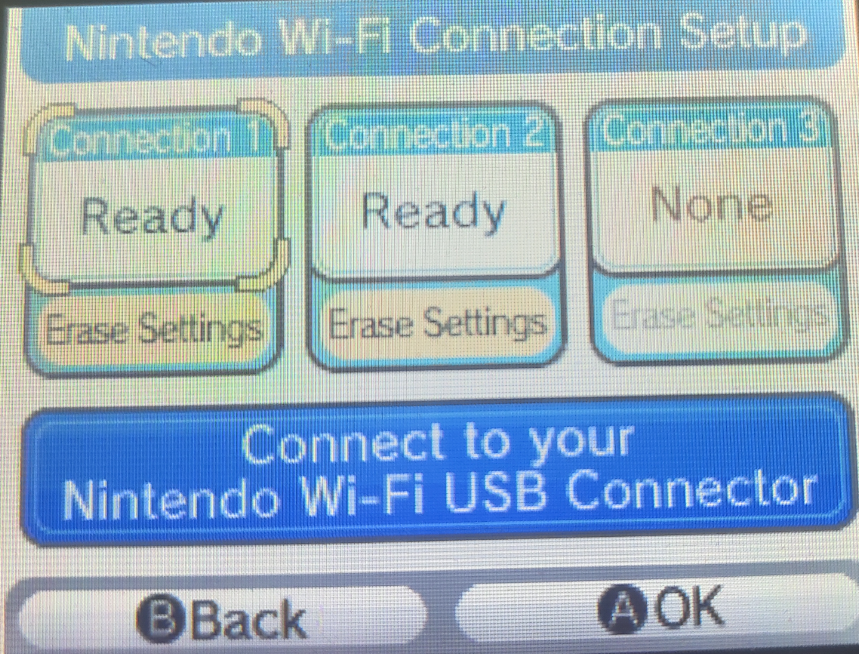
Then I accessed the settings
-
And finally I had access to the WiFi settings
And then, another limitation: the DS accepts either unauthenticated networks or WEP-protected ones, that neither my phone or my router support. So I just went with an unprotected access point. Oh, and no 5GHz, obviously.
Fortunately, programmatically speaking, devkitPro provides a dswifi9 lib that handles all that mess on its own and we just have to Wifi_InitDefault(WFC_CONNECT).
The Side-Quest
After that, I started messing a bit with raw sockets, but sadly the only record I have of that is this image: 
Anyways, it rapidly became evident that I would definitely not connect to the BotWave remote connection using WebSocket. It's already a miracle if I can get it to work with a TCP socket.
So I had to build a compatibility bridge, running on the pi, that sits between the BotWave WS and the connecting DS.
As for the code, it was quickly done by Gemini, since it's a small ~200 lines script.
To break down its internals, it's really just two asyncio loops glued together. One loop reads from the WebSocket and writes to TCP:
async for message in self.ws:
    data = message if isinstance(message, bytes) else message.encode()
    self.tcp_writer.write(data)
    await self.tcp_writer.drain()
The other does the opposite, reading from TCP and sending over the WebSocket:
while self.active:
    data = await self.tcp_reader.read(4096)
    await self.ws.send(data.decode('utf-8'))
Both loops run at the same time with asyncio.wait(..., return_when=asyncio.FIRST_COMPLETED), so the moment either side dies, the bridge tears down the whole connection instead of leaving a dangling half-open socket.
The only annoying part is that WebSocket talks in messages while TCP talks in a raw stream, so there's a bit of glue to keep both sides from misunderstanding each other (decoding bytes, occasionally slapping a newline at the end). Everything else is just making sure nothing's left dangling when one side disconnects.
The challenging part was integrating it with BotWave itself. Since I wanted it to be easily reusable for other projects, I had to make it self-contained and easy to plug into any BotWave setup.
First of all, having a python script is nice, but integrating it can rapidly become a mess. That's why I made two small shell scripts, to start and stop the program.
Since it isn't the main thing of this blog post, I won't explain how it works in details, but you can find the full project on GitHub.
To do a rapid summary, the starter script takes the value into REMOTE_CMD_PORT to retrieve the WS port, and then either takes its first argument for the TCP socket port, or defaults to 9940. After parsing the values, it starts the python script as a background process.
The stop script creates a /tmp/killwtt file, that the bridge continuously watches, and stops itself if it exists.
All of those scripts are automatically ran using BotWave handlers and custom commands.
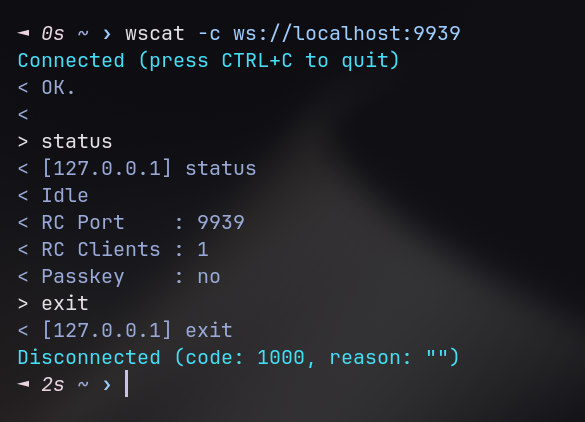
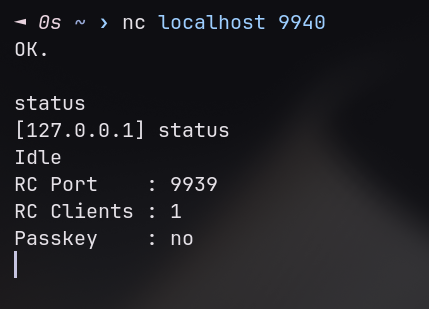
As a result, I now can connect to BotWave using a raw TCP socket, which will make it way easier to access it for our DS:
Building the Software
Now that the bridge was running, I had to actually write the DS client.
The first real challenge was the socket. The DS network stack is functional, but the default behavior is blocking, meaning if nothing comes in, the whole program just freezes waiting. On a console where you need to be scanning inputs and redrawing the screen every frame, that's a death sentence.
The fix is FIONBIO, a flag you pass to ioctl to make the socket non-blocking. After that, recv returns immediately whether there's data or not, and you just check errno for EAGAIN to know if it was empty.
int iMode = 1;
ioctl(g_sock, FIONBIO, &iMode);
One line. Took some hours to get there though.
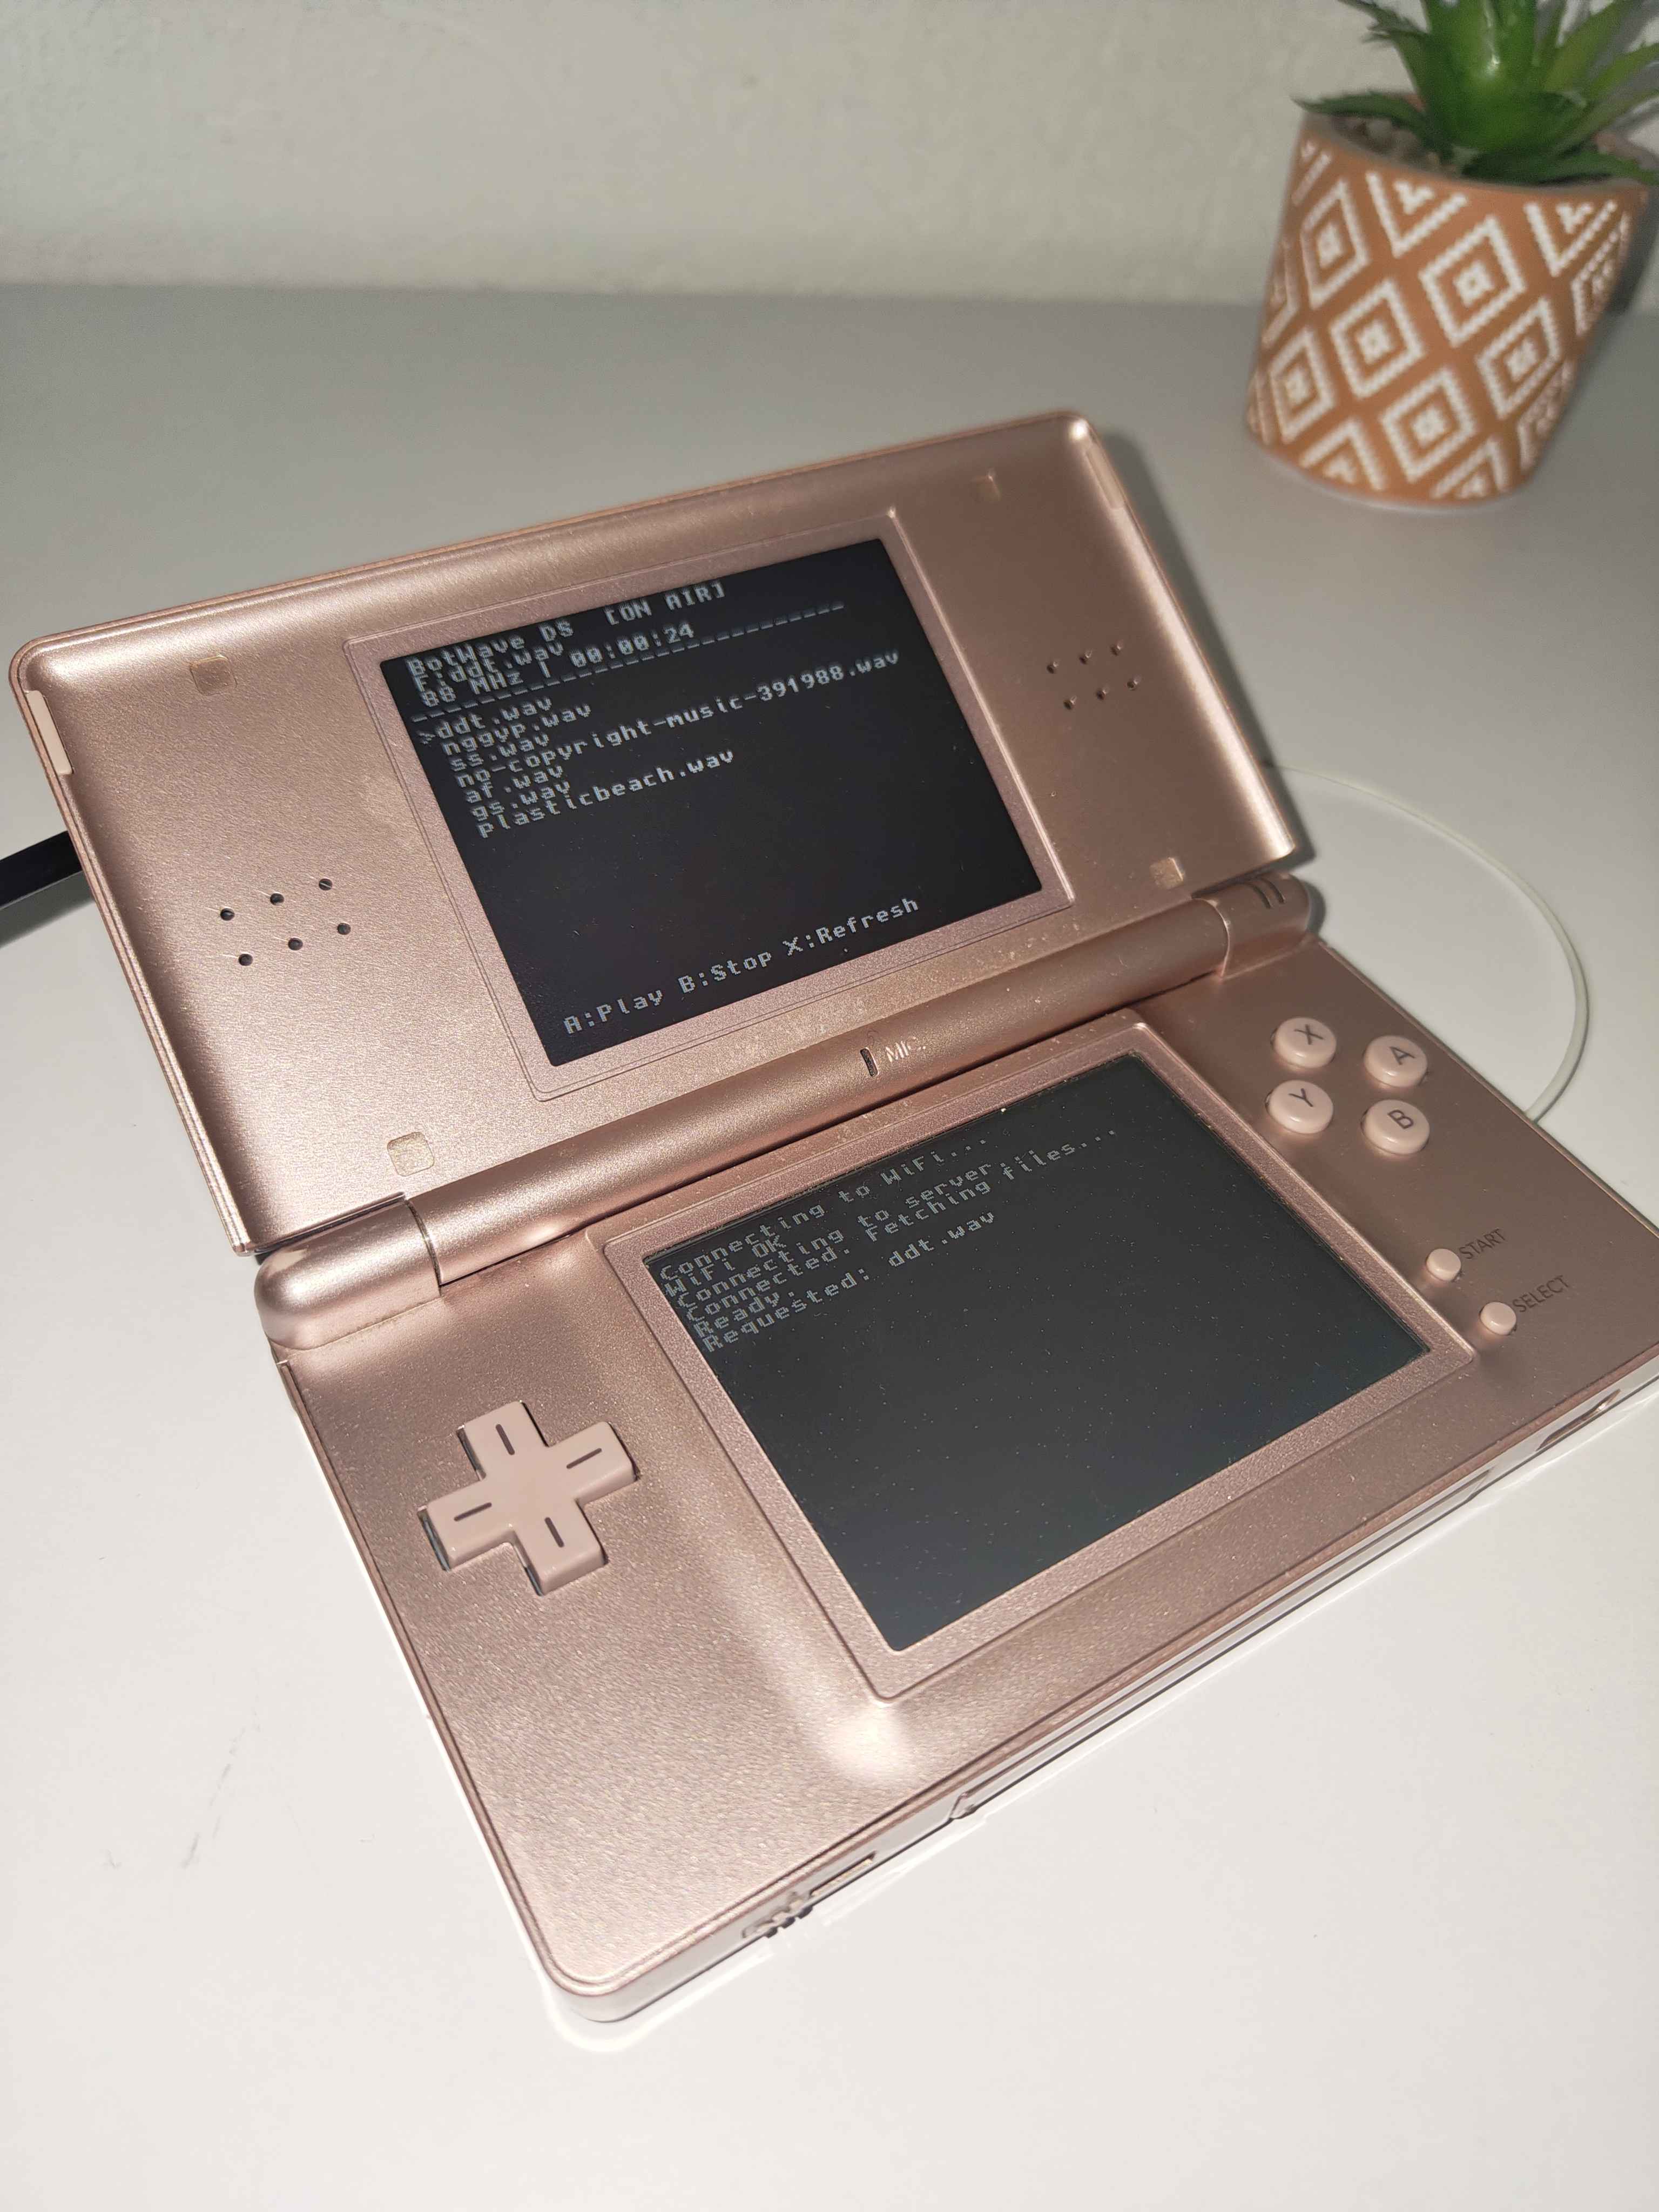
As for the software itself, the concept is simple: the DS connects to the bridge, sends commands, and parses the responses to update the UI. And since it's a DS — two screens — I figured I might as well use both. The top screen shows the file list and the current broadcast status — the bottom one, a scrolling log of what's happening. You navigate with the D-pad, A to play, B to stop, X to refresh. devkitPro makes this pretty easy with its PrintConsole system, you just init two consoles and consoleSelect() to switch which one you're writing to.
The trickier part was parsing. BotWave's TCP output is a live stream: it doesn't pause and wait for you, it just keeps printing. So when I sent a lf (list files) command, the response would arrive mixed with whatever else the server was already outputting.
Fortunately, BotWave has a built-in transaction_id system — you can add transaction_id=something to any command, and every line of its response will carry that same tag back. On the DS side, I just generate a unique ID per command and only process lines that match it:
snprintf(init_cmd, sizeof(init_cmd), "lf transaction_id=%s", g_expected_lf_tx);
Everything else gets ignored. It's what made the whole parsing reliable without having to do anything clever.
The last piece was keeping the UI actually up to date. Once you're in the file browser, the DS polls BotWave's status command every 3 seconds — current file, frequency, uptime, whether it's on air or idle. That way the top screen stays live without hammering the connection, and you always know what the Pi is doing with minimal delay.
And here is the final result:
Putting it All Together
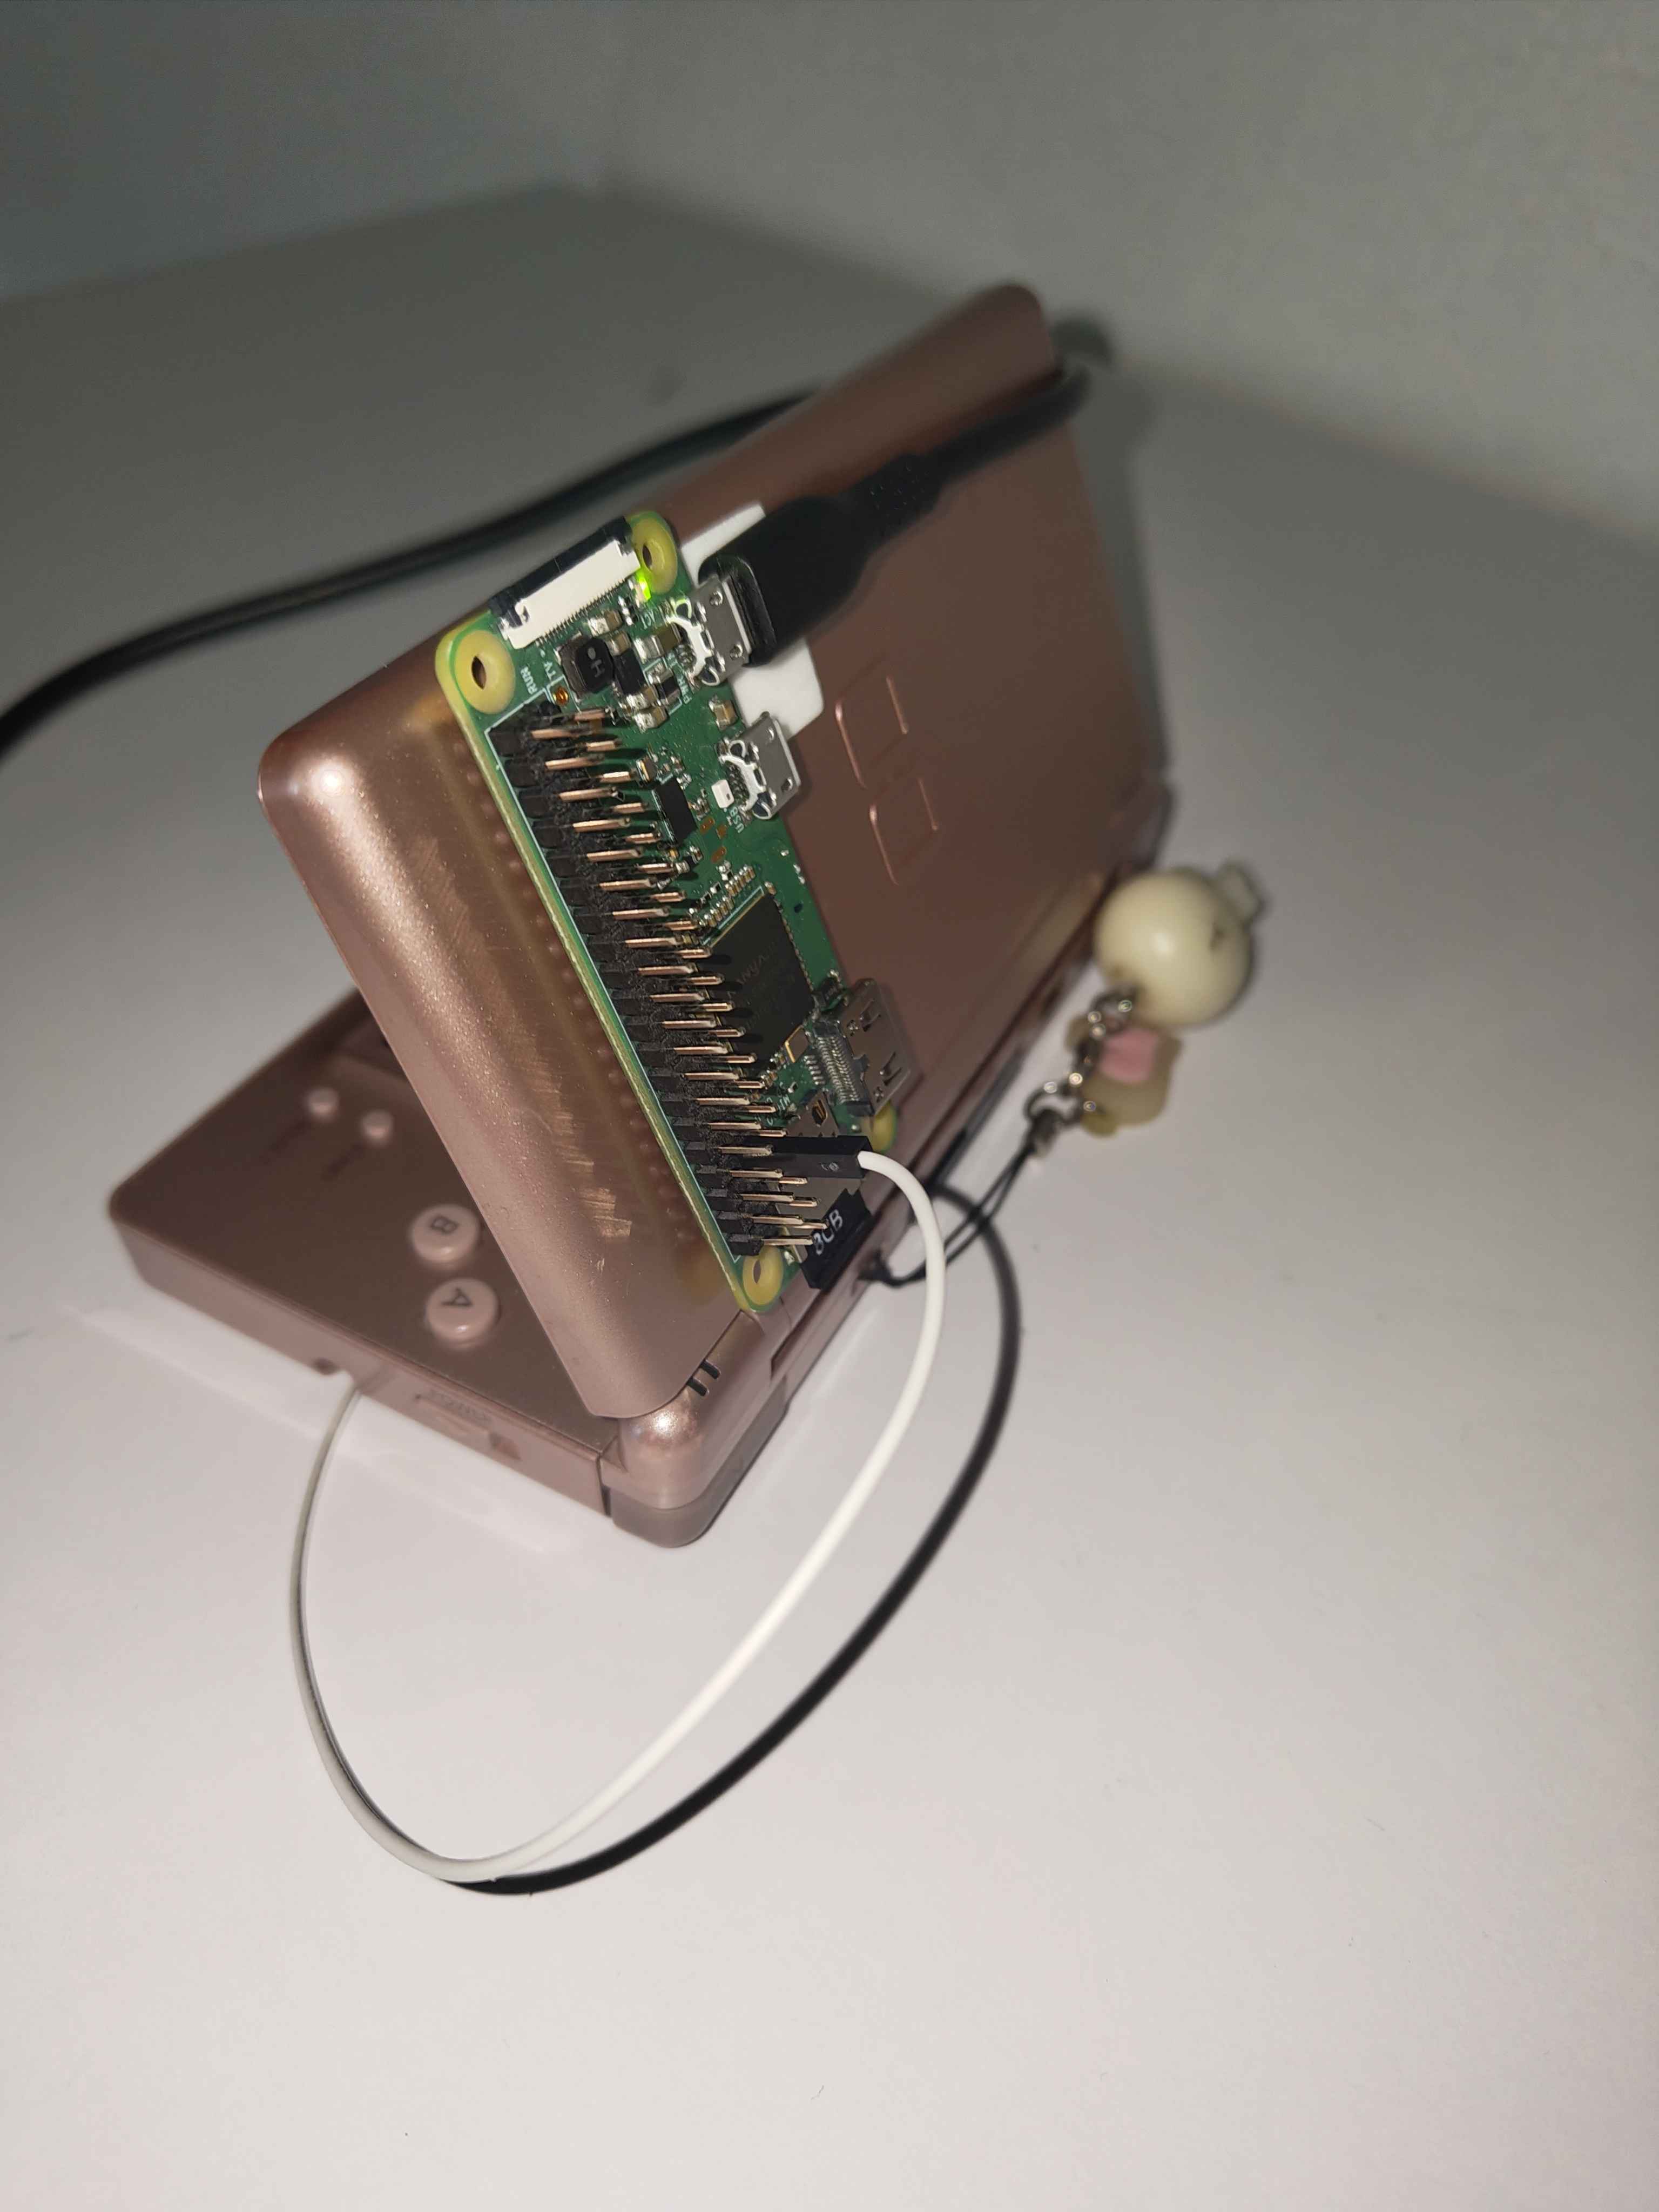
Finally, even if it technically works right now, I'd want it to be more of a single device that I can transport anywhere. To do this, I took a Pi Zero — specifically for its size — slapped it on the back of the DS, and turned it into an access point for the DS to connect to. Additionally, I made BotWave start on boot:
# setup the AP
sudo nmcli connection add type wifi ifname wlan0 con-name "DSRad" ssid "DSRad"
sudo nmcli connection modify "DSRad" 802-11-wireless.mode ap 802-11-wireless.band bg ipv4.method shared
sudo nmcli connection modify DSRad connection.autoconnect yes

# start BotWave on boot
sudo bw-autorun local --rc 9939
And, for the final touch, I duct-taped the pi on the back of the DS
As for the final note, if you wish to fully reproduce this project, a full guide is available on GitHub.
Cherubim · 2026-06-19 11:14:56
damn thats cool
Sera.phim · 2026-06-19 01:11:44
this is very kewl
epic guy · 2026-06-17 19:50:53
this is epic
Douxxtech · 2026-06-17 22:45:12
Thanks!